In the first lessons we focused on getting you operating. Let’s spend some time on making that experience better. In this two-part lesson we’ll go through many of the features in the radio. What do all the buttons and knobs do?
The first part of this lesson will be based on settings you can use to improve your reception. That makes it easier to find other stations.
The second part of this lesson covers functions related to transmitting and frequencies. If you need to know that right away, jump to that lesson now.

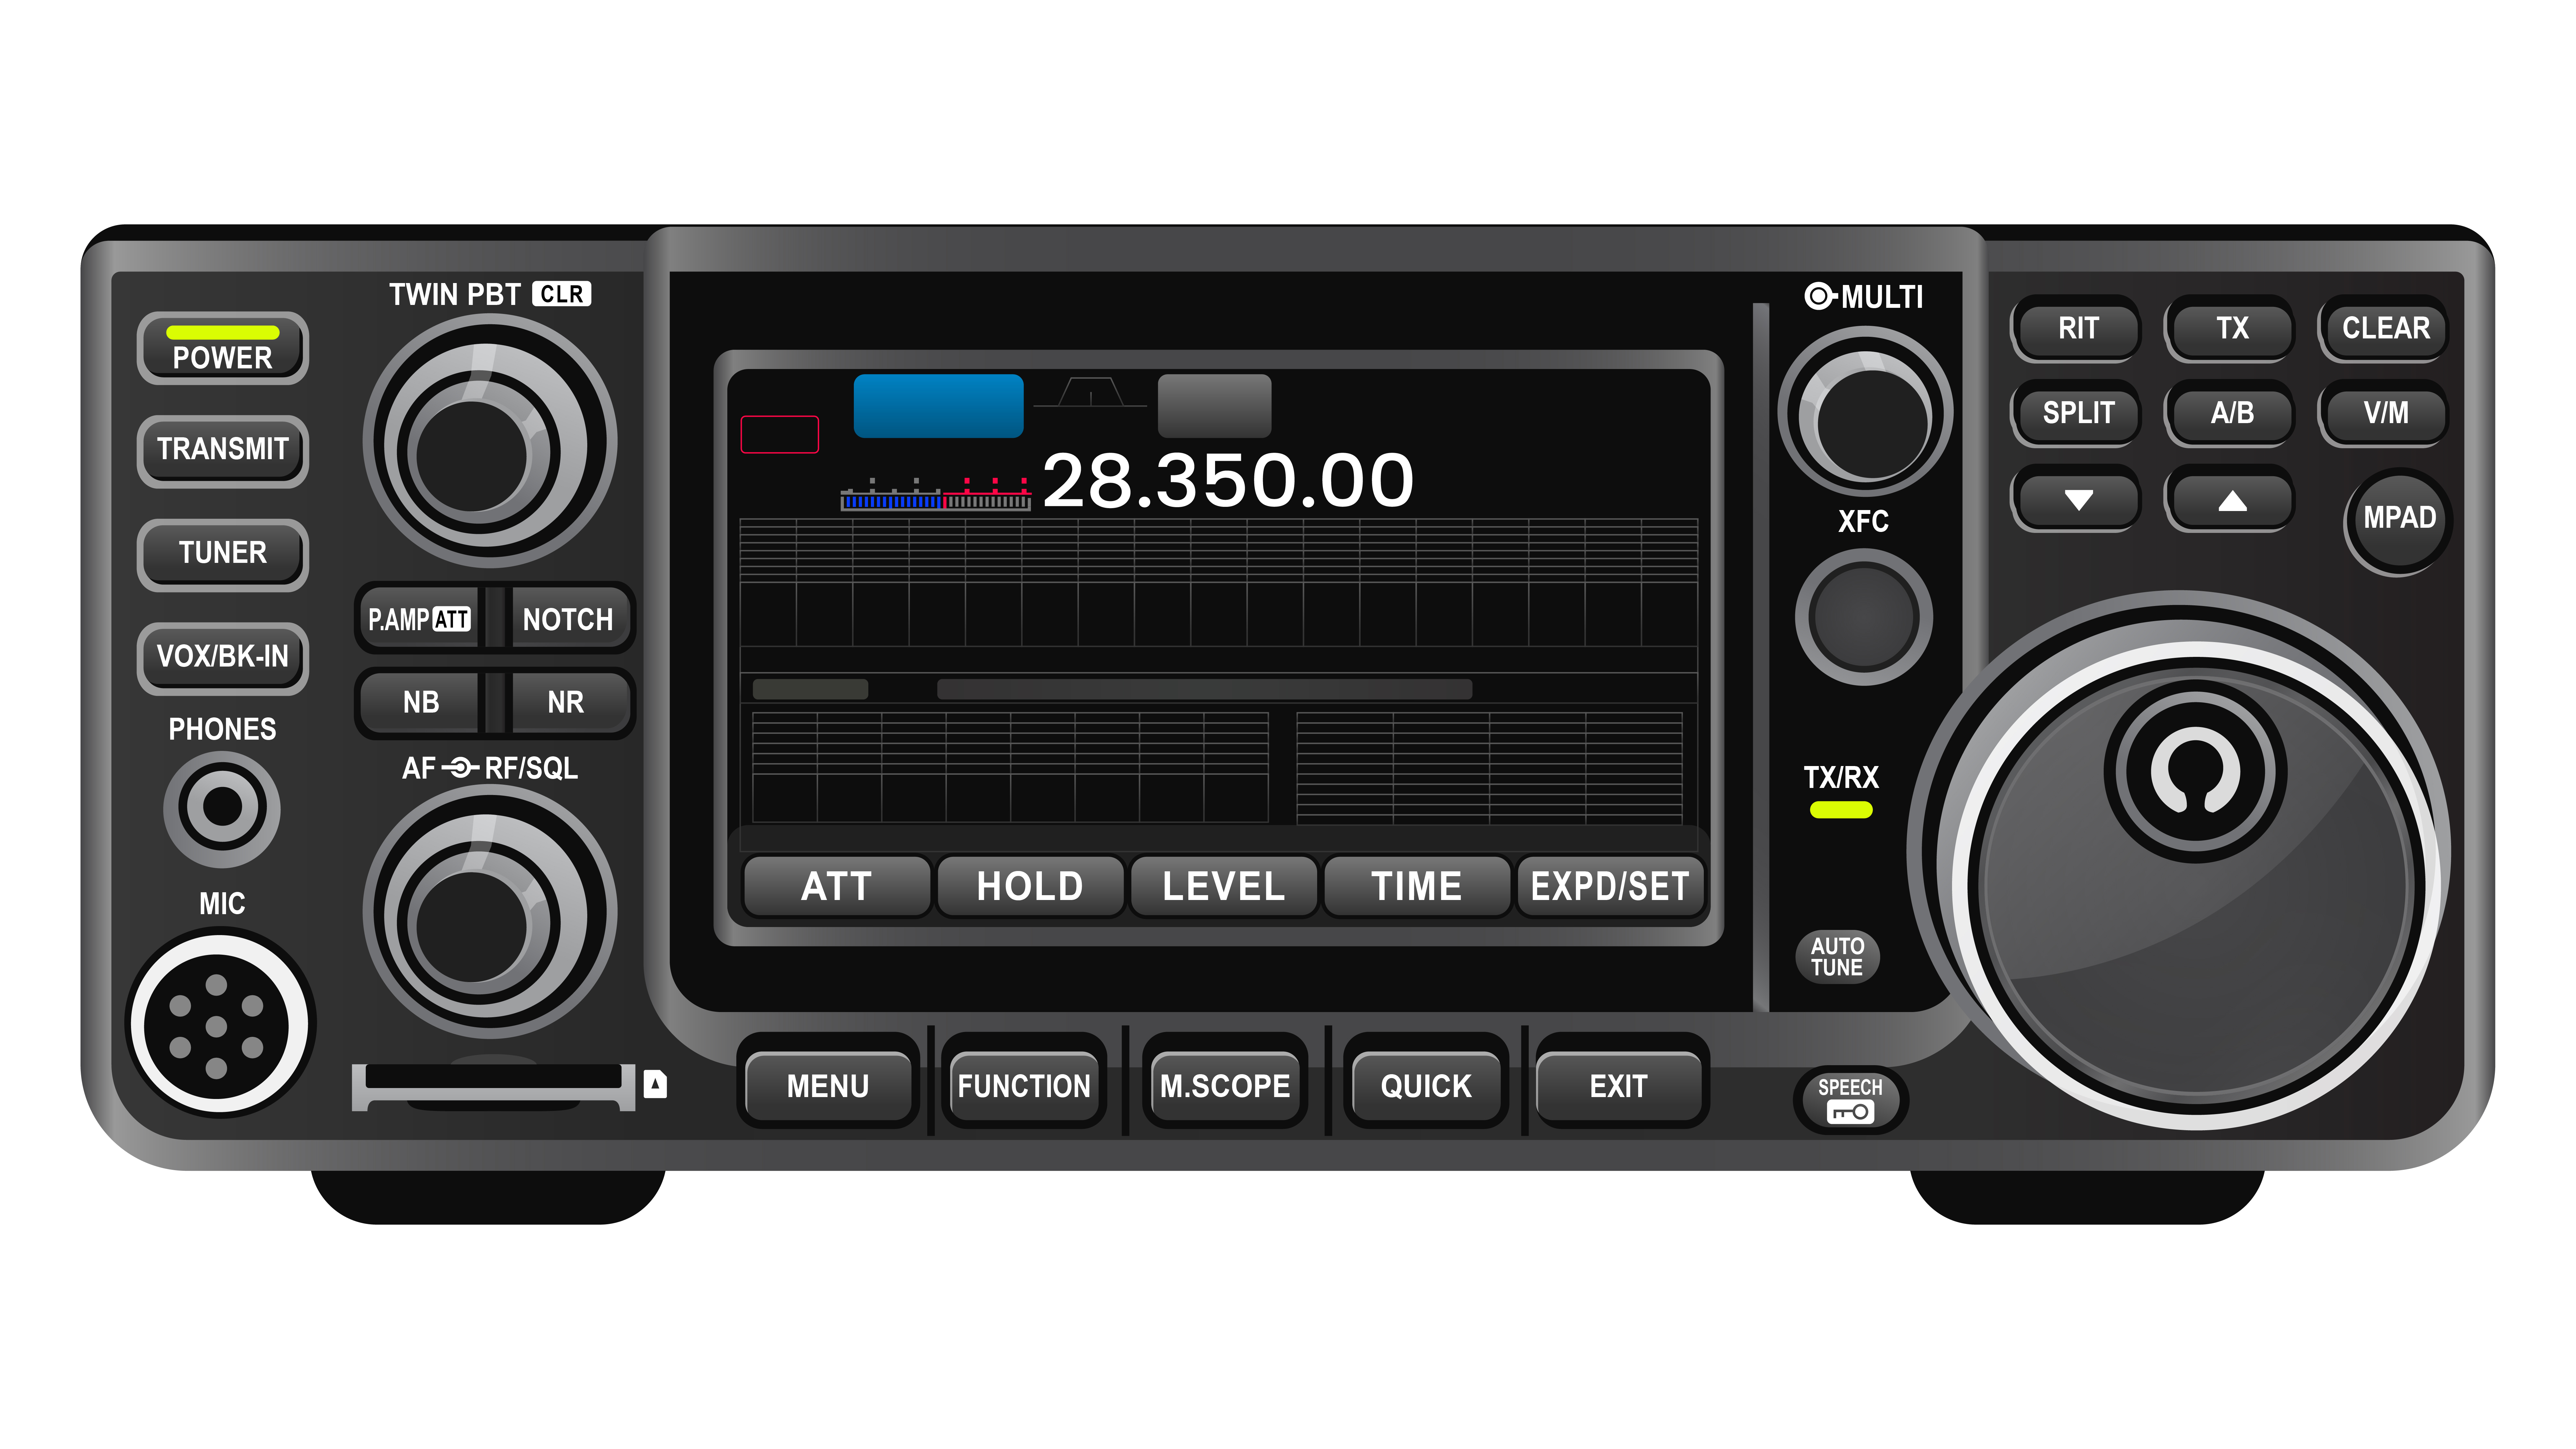
Count them up! The IC-7300 has lots of buttons and knobs
There are 31 buttons and knobs on the front of this radio, not including all the things you can do on the touch screen. That means there are probably hundreds of settings on this radio you can tweak and adjust. In this lesson on reception, we’ll cover:
– Using the spectrum scope / waterfall display
– Checking the meters
– Managing your receive audio
Waterfall
You are going to get a lot of info by monitoring the screen of your radio. One of the coolest things is being able to see signals by using the spectrum scope, also known as the waterfall.
Most waterfalls display the signals in two domains, the frequency domain and the time domain. What that really means is when you look at the horizontal layout of the waterfall you are seeing a section of the band. The vertical layout shows the signal strength peaks above the line, and signals over the last few seconds on the lower section.

Waterfall Display
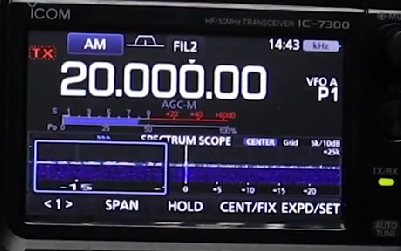
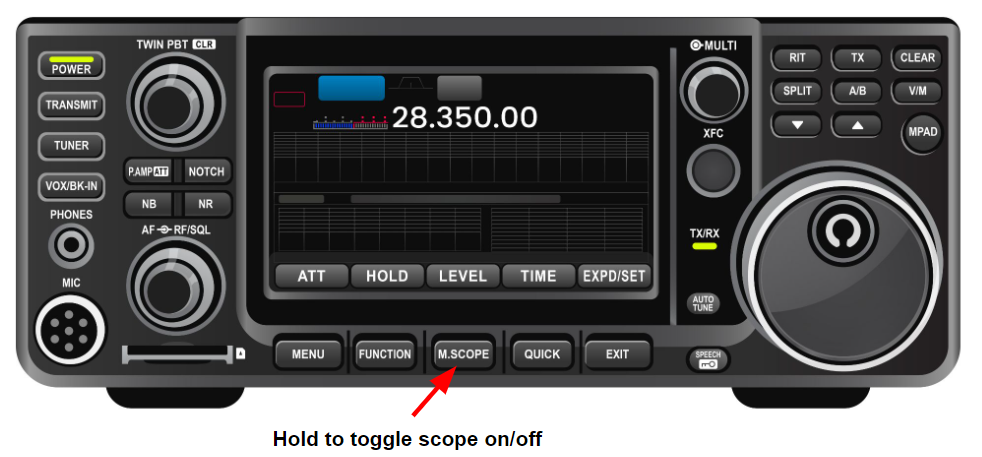
Let’s turn on the waterfall. On our radio push and hold the “M. Scope” to toggle the scope on or off. One view you can display on the scope is “Center” mode. This is where your active frequency is always in the center of the display. If you want a different look, select “Fixed” mode. That continually shows one part of the band, and your active frequency moves up and down on the scale.

You can set the width of the display to show anywhere between 2.5 and 500 kHz. Tap “Span” to cycle through. Looking to find a signal to work? The brighter the line, the stronger the signal, so just tune over there and go. There are more settings you can customize! The 7300 manual has a whole chapter on using your scope. Read up there if you want to deep dive, but this will get you started.
Meter Adjustment
Let’s stay on the display and look at your meters. On the left of the touchscreen is your meter. This meter is dynamic. It displays different items depending on if you are receiving or transmitting.
In default receive mode the meter is in “S” mode, for signal strength. While you are operating keep an eye there. Use it to give an accurate report back to the distant station .
In transmit mode you can display Power (that’s shown as Po) and other metrics. As you are setting up to operate you might want to see SWR. Later on look at ALC (Automatic Level control). That’s a good view when making mic adjustments or checking levels on the speech compressor. The speech compressor focuses your vocal range into the SSB bandwidth.
As you are operating you may want to check the Voltage and current drain or the temp of the internal amplifier. There are meters for those functions too.
You can choose your meter by clicking “Quick” on the front panel and then “Meter Select.”
Menu Function / Recording Setup
We’ve shown you how to change bands, frequencies and modes via the touch screen. Now, let’s tap the menu button to see what else you can set.
Touching the “Set” button on screen will let you deep dive into all the options like setting the time. Let’s set up the radio for using an SD card. The SD Card can be from 2 to 32 GBs and it will allow you to record audio and your screens while you operate.
Use a blank SD card and let the radio format it for best performance. Once you get the SD card formatted – exit out of the menu by selecting the Exit button on the front panel.
We’ll enable recording through the front panel menu too. Touch the “Quick” button then click <<REC Start>>>. Now, every time the squelch is opened on the radio or the mic is keyed, you’ll see a red dot at the top screen. It’s next to the SD card and indicates that the recorder is operating. If you see two lines “||” it tells you the recording function is paused.
If you want to replay a QSO with a friend or check a call sign, it’s easy. Pop out the card and put it in your computer to play back the file. Files are stored by date and time as WAV files in the “Voice” directory.
Function – Incoming Signal Adjustments
Your radio is sophisticated enough to enable you to manage incoming signals in a variety of ways. This will help make those signals more audible. We’ll use the “Function” button below the screen to go through some examples. Many of these functions have their own dedicated button on the front panel as well.
P.AMP/ATT is for “Pre Amplification” and “Attenuation.” You would turn on your radio’s Pre-Amp to make low powered incoming signals louder. There are three levels for Pre-Amp, off, level 1 and level 2. Level 1 is designed for HF and Level 2 for 6 meters. You simply quick click the on-screen icon or the P.AMP ATT button to toggle this.
The attenuator is used when signals are too strong into your radio. You can cut the signal strength to reduce distortion. Turn that on with a long press of the same button, and off with a quick click.
Let’s do notch filtering next. Let’s say you’re listening to a beautiful DX signal. Frustratingly, someone is tuning their antenna right on the same frequency! You can filter this spurious carrier like a tuning signal. To do that, enable the notch filter to block out just that little bit of signal. The radio has an auto notch filter that should do it for you. If you want to get more granular, check the manual for details on using the manual notch filter. You can turn it on or off via the function screen or the Notch button to the left of the screen.
Two more types of incoming signal management, Noise Blanking and Noise Reduction. If you’re picking up pulse noises from something like a car engine, noise blanking is what you’ll want to use. Quick tap to toggle on and off, long press to get some custom settings.
Noise Reduction enables digital signal processing. The DSP will help cut some of the static noise and other “random noise components” (that’s what it says in the manual). Like Noise Blanking a quick click toggles it on and a long click gives you intensity options.
All of these signal management filters are like seasoning your food. You want to do it to your own personal taste. I like to run as little as possible but sometimes you need to bring these tools online to help out. If you run too much it can spoil your signal and make it hard to bring in weak signals. This is a great place to experiment.
You can keep track of what’s activated on the display. Below the frequency, small text indications like ATT or NB show if these tools are in use.
Above the physical buttons for these functions are knobs for “Twin Passband Tuning.” This allows you to manipulate the high and low end of the frequency being received. It shifts the frequency of the receiver slightly without changing the main frequency dial. When would you do that? Let’s say you are on the Maritime net on 14.300 and you hear most of the stations fine, but one is a bit off frequency. You can use this passband tuning to adjust the received audio to narrow the incoming signal. The manual has more information on how this works.
Have you ever heard of a station working “split?” That means they are listening on a different frequency than they are transmitting. They would be calling something like “Alpha Alpha 1 Romeo Charlie, listening 5 Up.” So if they were transmitting on 21.300, they want you to call them back on 21.305.
How do you set your radio to do that? Push the 𝛥TX (DeltaTX) button. You see a small display that says 0.00 in the corner of the screen. Use the multi knob (that’s the small one) to adjust your transmit frequency. In this case, +5 kilohertz, where the DX station is listening. A quick tap toggles it off when you are done.
One more incoming signal adjustment option is the IF filter. For Single Side Band operations you can set this so you are listening to 3.0, 2.4, or 1.8 kHz of the band. Just tap FIL # on the screen to toggle to the next one. 3.0 or 2.4 kHz signal width is great for general operating. If you are intensely contesting, try narrowing down to 1.8. This might help you pick things out when signals get really crowded on the band. This has many more custom adjustments too, so check the manual.
Recap
There are a few ways to use the receiver to improve your DX performance. One is being able to adjust your receiver to better hear weaker signals, like using the Pre-Amp. Dialing in better sounding audio will also help you pick out those DX stations over the noise. Not every country is going to have an operator running the legal limit with a yagi pointed at your QTH. Experiment with these settings as you go, and use the manual as a guide if you need more information.
Ready to focus on the transmit and frequency functions of the radio? Then continue on to the second video in this lesson.
Additional Help and Discussion!
Need some additional help or want to discuss with other students?
Join the HF Operations channel at the World Radio League for help, support, and discussion!

